Tuesday, 30 August 2011

Tip #80: Give your film subtitles

By Dan Parkes (Director/editor)

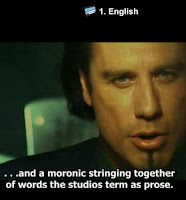
Subtitling your film might seem an unnecessary or even an indulgent option. However, if you are considering overseas festivals you might be asked to provide the English subtitles for translation, or having hard-of-hearing subtitle options may open the film up to markets you had not thought of. The fact is that putting subtitles on your film is now a relatively easy option that uses free software and hence something we recommend. There are two different work flows we have used:

1. Separate DVD subtitles
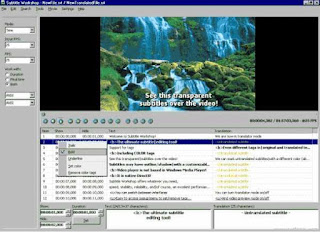
Subtitles that can be switched on and off via a DVD menu option are the easiest and probably most common. It first involves transcribing the English dialogue (and sound effects if for hard-of-hearing) and the best software for this is VisualSubSync (www.visualsubsync.org). Here you import your video and it automatically extracts the audio waveform. I personally find this the easiest way of timing the subtitles to the video -by seeing the dialogue visually means you can make sure it starts at precisely the correct point. VisualSubSync also has some good error checking settings to make sure the subtitles are not too long or too fast etc. Once finished we then took the resulting .srt file and imported it into Subtitle Workshop (http://www.urusoft.net) where we could then convert it into a .txt file for importing into our DVD authoring software, Adobe Encore, which allows importing .txt files, or for sending off to get translated. The subtitle files, .srt or .txt are essentially timecode information alongside each line of subtitles, and so are relatively easy to create, check and alter if need be.

VisualSubSync (www.visualsubsync.org)

2. Burned in subtitles
Sometimes you might want 'burned in' subtitles -meaning that rather than the above option that allows you to switch them on and off they are in fact 'burned' into the video and cannot be removed. This is sometimes necessary for web delivery or in cases where you want complete control over how the subtitles look. Here is the work flow we have developed for achieving this:

  1. Create the subtitles in either VisualSubSync (www.visualsubsync.org) or Subtitle Workshop (http://www.urusoft.net)
  2. Import the film as an .avi file into VirtualDub (http://www.virtualdub.org/)
  3. In VirtualDub enable the TextSub filter. Navigate to Video /Filters/Add… and select the TextSub filter in the list. Press OK. In the pop-up window, press “Open” and browse to your subtitle file. This file must be in one of the supported subtitle formats (srt, sub, smi, psb, ssa, ass).
  4. Back in the VirtualDub video drop down menu, make sure you’ve got Full processing mode selected, and go to Compression. Here you need to select one of the available codecs. Xvid does a great job for a free codec, and that’s the one I used. You can alter some settings, and tweak the quality of the video if you press Customise.
  5. Also make sure that the program is set up to do a Direct stream copy of the audio; this means the audio doesn't have any processing.
  6. Finally, save the video somewhere on your computer, and wait for the process to finish.
  7. As an alternative, if you are wanting more control over the subtitles afterwards, you could instead use a proxy solid colour video of the same length and resolution when creating the subtitles in VirtualDub, which you then export as a video file, import into your NLE and then using chroma key tools key out the colour leaving just the subtitles on an alpha channel (meaning you can now move them around so they don't go over lower thirds etc).

Subtitle Workshop (http://www.urusoft.net)

3. Translation
  1. Load the video and the subtitles into Subtitle Workshop.
  2. Click on the tab EDIT and select "Translation" and Translation Mode. You will now see two columns, the original subtitles and the translation subtitles. The Subtitles on the left will only show on the video. If you want to see the translated subtitles on the video, go to EDIT and select "Translation" and "Swap". The translated subtitles will now be on the left and you will be able to see it on the video.
  3. Export to preferred format as described in 1.
4. Subtitle Tips
  • For separate subtitles, don't forget to create a DVD menu option to select the subtitles, and to make sure the default is set to OFF.
  • Don't create long subtitles -it is better to break up long sentences into several separate subtitles
  • If there are two people speaking almost at the same time or overlapping, you can show both pieces of dialogue on the screen at the same time by using a "-" at the beginning of each line
  • When using Subtitle Workshop be careful to make sure you have the correct framerate (as it also creates subtitles via frame numbers).
  • When creating burned in subtitles in VirtualDub the .avi aspect ratio for widescreen standard definition can cause problems -you can make sure of the correct aspect ratio by adding the resize filter and setting it to: Absolute 1024x576.

Friday, 26 August 2011

Tip #79: Have a Blu-ray mastering workflow

By Dan Parkes (Director/editor)

Although not (yet) commercially released in the Blu-ray format, Ambleton Delight was mastered in HD and hence we created a Blu-ray master first, before down-converting it to DVD. This is something we recommend all filmmakers do, as not only will it look great on a HD TV, but it future-proofs your film and also allows for HD quality projection if shown in a cinema (e.g. cinemas such as Cineworld are now equipped with Blu-ray players that can be used with their digital projectors). This is the workflow we used:

1. Export HD master file
Since the film was shot and edited in HD we simply exported the entire film as a HD master file, in our case, from Adobe Premiere Pro CS3, as an .avi file using the Cineform intermediate codec. (For more information on this refer to our earlier blog: http://ambletondelight.blogspot.com/2011/02/tip-63-establish-editing-workflow.html)

2. Encore authoring
We then authored the Blu-ray disc in Adobe Encore CS3, making sure all the menus etc we at HD resolution (ie at least 1280x720). It is recommended to create these menus separately in image creation software and then import to the authoring programme. We created ours in Photoshop.

3. Add extras
The great thing about Blu-ray is the ability to fit up to 23GB of data on the basic 25GB discs, compared to 4.3GB on standard 4.7GB DVDs. This not only allows for higher quality video but a load more extras. On the Blu-ray version of Ambleton Delight we could include the full Making Of plus other extras such as deleted scenes and the alternate ending -something that would just not fit on a standard DVD.


4. Burn DVD and HD
Adobe Encore has a great feature -the ability to export both a Blu-ray or DVD disc from the same authoring project. It does involve creating different transcodes for each disc and so there is some extra rendering time. You also need to decide whether your Blu-ray video is transcoded in either MPEG2 or h.264. H.264 is higher quality but takes a lot longer to transcode, unless you use a Matrox system which has the ability to speed up h.246 encoding.

5. HD Image file
We also recommend not burning direct to disc but creating an image (.iso) file for both the Blu-ray and DVD discs, that can then be burned to disc using IMGburn (http://www.imgburn.com/) which can verify the accuracy of each disc that is subsequently burned.

Tuesday, 23 August 2011

Tip #78: The frame rate format wars: PAL vs NTSC

By Dan Parkes (Director/editor)

Formats can become a complicated issue in film production. Even when presented with opportunities to simplify and standardise formats (such as with the invention of DVDs and then HD) instead further complications were introduced. There are some good reasons for this -mostly due to regional differences in power supply and to prevent piracy and control pricing (i.e. DVD region codes).

PAL(25p) vs NTSC (30p)
PAL (Phase Alternating Line) is primarily a European/Australasian television format, or used where electricity supply is 50Hz. It now essentially refers to a frame rate of 25 or 50 frames per second . NTSC (National Television System Committee) on the other hand is primarily an American television format, or where electricity is 60Hz and refers to a frame rate of 29.97 or 60 frames per second. In the days before HD, PAL and NTSC also involved differences in vertical and horizontal resolution (PAL: 720x576, NTSC: 720x480), but thankfully that has been standardised, with HD resolution coming in at either 720p (1280x720) or 1080p (1920x1080). But the key difference in frame rates still remain, and the resolution difference does apply for DVDs. (Note: for reasons of simplicity this blog is referring to hard copy media such as discs, and not broadcast formats.)

Click on this map to see more precise information
on what format is used in which country.


Some considerations
So if you are purchasing or using equipment in a European country then you are most likely going to be shooting at 25p or 50p. In the US that will likely be either 29.97/30p or 60p. Even if you are filming at 24p (filmic) you will also eventually have to think about having it converted to either the European or US format. Generally speaking, most PAL DVD players in Europe will play a NTSC DVD. However it seems that very few NTSC DVD players can play a PAL disc. So you will eventually have to think of converting.

Conversion options
And this is where it can get really tricky for filmmakers, especially when thinking of submitting films for international festivals. There are two options you have for PAL-NTSC or NTSC-PAL conversion:

1.Conversion with a fixed running length
This method keeps the total length the same, but in order to do so, it has to interpolate (i.e. estimate frames that are between 2 original frames) or blur frames together via "frame blending" or "frame skipping". This maintains the same audio, but can be a slow process and more importantly, result in low quality output and unnatural motion.

2. Conversion with a fixed number of frames
This is what is referred to as ‘conforming'. You keep the same number of frames -they are just played at a slower/faster speed. However, this much better quality conversion also involves changing the speed of the audio. For example film conversion from 24p to PAL involves a 4% increase in speed, which raises the pitch by 0.7 of a semitone, something which is not normally noticeable and can also be 'pitch shifted' (restoring the original pitch).

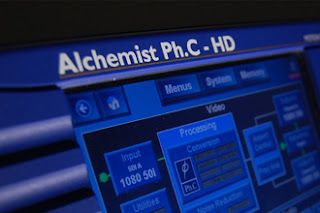
There are both expensive and cheap (and nasty) options to achieve either of the above -at the top end you have the Snell & Wilcox Alchemist standards converter used by professional companies. At the other end of the scale you can try exporting it directly from your NLE in the desired frame rate -although this will likely be using the fixed running length conversion mentioned above in no.1, which is a low quality method.


Here are some other possible options:
Issues to look out for:
  • Progressive/interlaced (if interlaced the field order can change i.e. "Upper Field First" or "Lower Field First").
  • Changing the frame rate can cause the audio to become unsynchronised.
And it looks like things might change again, with filmmakers such as James Cameron and Peter Jackson talking about 48p as a standard (The Hobbit is being filmed at this frame rate).

Please note: If you spot any errors or would like to add some extra advice for filmmakers, please feel free to comment below.

Saturday, 13 August 2011

Watch the entire feature film on-line!

We are pleased to announce that the award-winning UK indie film Ambleton Delight can now be watched on-line via VOD (Video-On-Demand). It costs only USD 1.99 for 3 days access, with payment via PayPal or Amazon. Click the link below to find out more:


Thursday, 4 August 2011

Tip #77: Making copies - Duplication versus replication

By Dan Parkes (Director/editor)

Once you have your official DVD master, you will then need to look at how to get copies made. You have three basic options available:

1. Personal or small run copies
As mentioned in the previous blog, rather than burning straight to DVD I recommend burning an image file (.img or .iso) of the disc first. Then you can use free software such as IMGburn (http://www.imgburn.com/) to both burn and verify (check) the disc. The reason for this is that when you need to burn extra copies you simply open IMGburn and burn the image file again, rather than opening your authoring software or having to insert the original disc and make a copy. The verification function ensures you are getting the exact same copy that has been checked for 100 % accuracy.

However this can end up being an expensive and time consuming option, especially if you also need to print out the DVD wrap (printed cover) and you may want to look at either duplication or replication for larger runs.

2. Duplication
For anything up to 500 copies duplication can be a good and cheap option. It is essentially the same as what you likely used to create your home burnt master disc, employing the use of purple dye discs which are "burned" (DVD-Rs). You can easily tell the difference between a duplicated disc and a replicated disc by turning it over and looking at the bottom surface: if it has a dark purple colour the same as the DVD-Rs you burn at home then it has been duplicated (while a replicated disc will be silver). The only difference is that the company the duplicates the disc probably used a duplication tower to do it in bulk. But the end result is the same: a DVD-R. A notable advantage is that quite often the turn around times are much faster than replicated discs.
3. Replication
This is most certainly the best option, especially for quantities above 500, as it creates the proper "stamped" DVD-5 or DVD-9, DVD-10 discs as you would buy commercially (not the purple dye DVD-R discs used for duplication). A “glass master” of your original disc is made which in turn "stamps" the data onto blank media. The disc is then printed and lacquered for protection. DVD-10 can offer a double-sided single layer which can hold up to 9.4GB of media (although in reality this is about 8.75GB) rather than the standard 4.3GB discs. However, due to the necessary glass master this can mean the turn around times are slower, although the per unit costs especially for large quantities is certainly a lot cheaper than replication.

But note that replication factories, due to their large commercial clients, can have various standards that have to be met before a DVD can be processed -which can be a hassle, although it does mean that you can be confident your DVDs are meeting industry standards!

Compatibility
There has been some who say that duplicated DVDs have more compatibility issues than replicated discs. However most modern playback devices now have no trouble with DVD-R discs due to their proliferation, as long as you ensure the DVD-R brand is reliable -I personally recommend Verbatim. Instead, the key issues now come down to PAL, NTSC and DVD region issues... which we will explore in the following blog.