 By Dan Parkes (Director/editor)
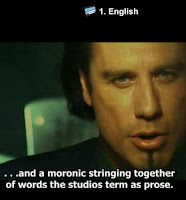
Subtitling your film might seem an unnecessary or even an indulgent option. However, if you are considering overseas festivals you might be asked to provide the English subtitles for translation, or having hard-of-hearing subtitle options may open the film up to markets you had not thought of. The fact is that putting subtitles on your film is now a relatively easy option that uses free software and hence something we recommend. There are two different work flows we have used:
1. Separate DVD subtitles
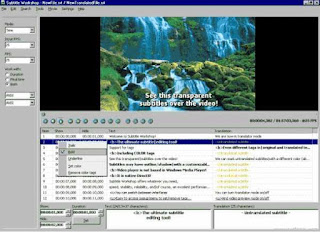
Subtitles that can be switched on and off via a DVD menu option are the easiest and probably most common. It first involves transcribing the English dialogue (and sound effects if for hard-of-hearing) and the best software for this is VisualSubSync (www.visualsubsync.org). Here you import your video and it automatically extracts the audio waveform. I personally find this the easiest way of timing the subtitles to the video -by seeing the dialogue visually means you can make sure it starts at precisely the correct point. VisualSubSync also has some good error checking settings to make sure the subtitles are not too long or too fast etc. Once finished we then took the resulting .srt file and imported it into Subtitle Workshop (http://www.urusoft.net) where we could then convert it into a .txt file for importing into our DVD authoring software, Adobe Encore, which allows importing .txt files, or for sending off to get translated. The subtitle files, .srt or .txt are essentially timecode information alongside each line of subtitles, and so are relatively easy to create, check and alter if need be.
2. Burned in subtitles
Sometimes you might want 'burned in' subtitles -meaning that rather than the above option that allows you to switch them on and off they are in fact 'burned' into the video and cannot be removed. This is sometimes necessary for web delivery or in cases where you want complete control over how the subtitles look. Here is the work flow we have developed for achieving this:
- Create the subtitles in either VisualSubSync (www.visualsubsync.org) or Subtitle Workshop (http://www.urusoft.net)
- Import the film as an .avi file into VirtualDub (http://www.virtualdub.org/)
- In VirtualDub enable the TextSub filter. Navigate to Video /Filters/Add… and select the TextSub filter in the list. Press OK. In the pop-up window, press “Open” and browse to your subtitle file. This file must be in one of the supported subtitle formats (srt, sub, smi, psb, ssa, ass).
- Back in the VirtualDub video drop down menu, make sure you’ve got Full processing mode selected, and go to Compression. Here you need to select one of the available codecs. Xvid does a great job for a free codec, and that’s the one I used. You can alter some settings, and tweak the quality of the video if you press Customise.
- Also make sure that the program is set up to do a Direct stream copy of the audio; this means the audio doesn't have any processing.
- Finally, save the video somewhere on your computer, and wait for the process to finish.
- As an alternative, if you are wanting more control over the subtitles afterwards, you could instead use a proxy solid colour video of the same length and resolution when creating the subtitles in VirtualDub, which you then export as a video file, import into your NLE and then using chroma key tools key out the colour leaving just the subtitles on an alpha channel (meaning you can now move them around so they don't go over lower thirds etc).
3. Translation
- Load the video and the subtitles into Subtitle Workshop.
- Click on the tab EDIT and select "Translation" and Translation Mode. You will now see two columns, the original subtitles and the translation subtitles. The Subtitles on the left will only show on the video. If you want to see the translated subtitles on the video, go to EDIT and select "Translation" and "Swap". The translated subtitles will now be on the left and you will be able to see it on the video.
- Export to preferred format as described in 1.
- For separate subtitles, don't forget to create a DVD menu option to select the subtitles, and to make sure the default is set to OFF.
- Don't create long subtitles -it is better to break up long sentences into several separate subtitles
- If there are two people speaking almost at the same time or overlapping, you can show both pieces of dialogue on the screen at the same time by using a "-" at the beginning of each line
- When using Subtitle Workshop be careful to make sure you have the correct framerate (as it also creates subtitles via frame numbers).
- When creating burned in subtitles in VirtualDub the .avi aspect ratio for widescreen standard definition can cause problems -you can make sure of the correct aspect ratio by adding the resize filter and setting it to: Absolute 1024x576.


No comments:
Post a Comment