Thursday 24 June 2010

Tip #37: Always prepare a shot list and floor plans

By Dan Parkes (Director)

Preparation and organisation are essential for any shoot, and one of the most important documents is a thorough shot list. This can be a simple list of shots as they relate to the script, but the more information you can add to this the better. For example list, the framing (wide/medium/close-up) the preferred type of lens (50mm), any camera action (tracking, handheld) and any on-set effects. This can help the crew prepare in advance what is required and quickly speed the process along. You can also include storyboard frames for reference.

Even more vital, from the producer’s perspective, is the need for it to be tied into an actual shooting schedule –listing the estimated time for each set-up, with even an allocated time for each shot, along with make-up, meal breaks and setting up/breaking down times. This means you can be completely organised and ensure you stay on schedule and achieve all you need to get the shots. A comprehensive shot list and shooting schedule also inspires confidence in your cast and crew. But only as long as your stick to it!

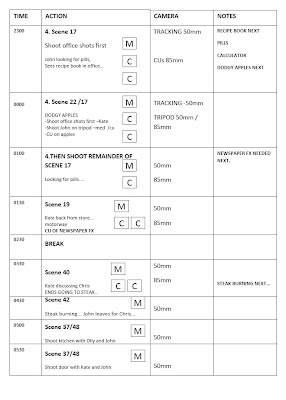
For our production we designed our own simple shot list so that it could be read at a glance. Here is a page from our shot list/shooting schedule in the restaurant (click to enlarge):
Notice the use of the abbreviations W, M and C to indicate Wide, Medium and Close-ups. Below is is an example from our shot list/shooting schedule in the kitchen(click to enlarge):
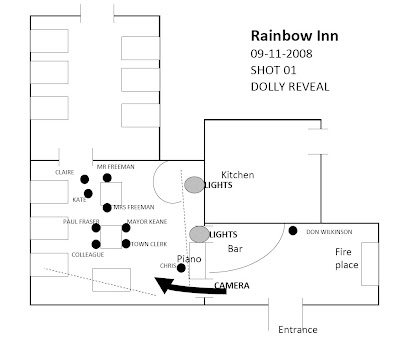
Another element that should not be overlooked is the benefit of having floor plans. A simple map of a location can be helpful on the day of the shoot to use as a reference when describing actor or camera and light placements. Floor maps can also include indications as to where the camera will move, where different characters will be, and lighting and sent to principle members of crew prior to the shoot so that advance preparations can be made.

Here is the floor plan from our restaurant shoot in The Rainbow Inn (click to enlarge):
Wednesday 16 June 2010

Tip #36: Storyboard key shots and scenes

By Dan Parkes (Director)

Especially thanks to detailed Making Of books and behind-the-scenes extras on DVDs, the art of storyboarding has become more popular in recent times, emphasised by the increase in elaborate actions sequences and CG effects.

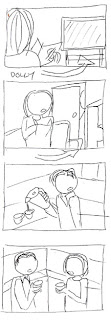
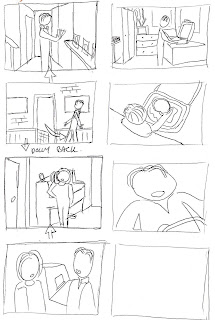
However storyboards are not only for effects shots. We created some simple storyboards to work out scenes where blocking may become complicated due to the number of cast members or due to the logistics of shooting in a particular location.

Here are a few things to think about when it comes to storyboarding:
  1. Storyboards are primarily designed to indicate character blocking, camera framing and angles, camera movement and edit cut points.
  2. Storyboards are great for breaking a scene down into a series of shots-wide, mediums and close ups.
  3. You can use them to calculate how many shots you can get from a particular angle.
  4. They can be used to create a comprehensive shot list (it’s good to include the storyboard in the shot lists used on set) that you can show crew on set.
  5. It is best to avoid letting actors see the storyboards, as it may cause them to perform unnaturally.
  6. Do not start storyboarding until a location has been chosen, otherwise you may find yourself storyboarding something that is impossible to shoot.
  7. Base storyboards on location drawings, photographs and floor plans.
  8. Storyboards read vertically, rather than horizontally, as is traditional with cartoon strips.
  9. They do not need to be elaborate art works; stick figures are just as useful.
  10. Don’t over storyboard –just key or difficult shots or scenes.
  11. You can even edit storyboard shots together with sound and music to simulate the finished piece and to establish pace; this is called “pre-viz” and can be done using computer software.

Wednesday 9 June 2010

Tip #35: Have a second unit

By Dan Parkes (Director)

We discussed in a previous blog the importance of getting together crew who work as a team and to keep the numbers to a minimum as having too many people on set can create unnecessary work, expenses and distractions. One other key to this is to have a second unit for filming non-principle photography.


In our case this simply comprised of the camera operator (Roger Marshall, above) and myself as the director. This meant rather than filming general shots, exterior shots and location shots etc with the full crew, we could at a later point visit all the necessary locations and shoot the outside of buildings, village shots and countryside vistas etc. This certainly takes the pressure off the main crew, keeps the expenses to a minimum and also meant we could flesh the film out with much more detail and depth, but at a time convenient to us.

We were also able to hire just for one day our most expensive piece of hired equipment –a jib- and go round and shoot as many crane/jib shots as we could manage in one day! Crane/jib shots are an excellent way of showing off locations and buildings and creating a more cinematic feel to the production.

Thursday 3 June 2010

Tip #34: Have a tapeless HD workflow

By Dan Parkes (Director)

In addition to the 35mm lens revolution that is sweeping indie productions, more films are now being shot to 'solid-state', doing away with tape. There are many advantages –the instant playback and also the speed at which material can be edited afterwards are two major points.

However there are also some disadvantages that must be considered: there is the possibility of corrupt files and errors, plus archival storage of the resulting files can be an issue due to the size of the files, even if they are compressed. Our answer was to shoot both to harddrive AND tape! The harddrive files are what were used primarily for editing, the tapes we used for archival. This meant that we had instant playback on set when we needed it, but then we also had to remember to keep changing tapes! But overall we found this to be the ideal workflow.

The only issue is that many new cameras are now only solid-state, being without a tape drive. We made the conscious decision to purchase a camera (JVC GYHD201) that could do both and seriously recommend this option if available.

The next issue is how to process the files. We decided to use Cineform as an HD intermediate codec which created lossless, uncompressed files that were easy to edit. More about this in a future blog…!

But it was important for us to shoot in HD. We shot in 1280 x 720 HD, which is known as HD1, as it is a slightly lower resolution version of HD. However it was more than enough for what we needed. It was also shot at 25p. Cinema frame rates are 24, so we were only one frame different. The ‘p’ refers to progressive –which means ‘full frames’ rather than the now being phased out interlaced frames which has alternating fields for faster action being played on a TV (e.g. 50i). So if you are looking for the filmic look make sure you are shooting progressive rather than interlaced.