Monday, 21 February 2011

Tip #64: Editing tools and techniques

By Dan Parkes (Editor/director)

In the previous blog we looked at the importance of establishing a workflow. Organisation is certainly one of the most important qualities an editor must have -along with a large dose of patience! Here are some other valuable and practical tools and techniques when editing:

1. Naming system
Especially if you are editing a large project (which may itself become divided into several projects) it is good to establish a logical naming system. Numbers and dates should be used. Ensure files are put in properly named bins and the files themselves named sensibly (no "untitled" files and sequences!). Your editing project should be organised well enough so that if another editor had to take over they would have no issues working out where everything is. This will ensure that if weeks or months down the line you have to return to the project you can quickly pick up from where you left off.

2. Cuts
Inevitably you will have different "cuts" or versions as you alter and improve the edit i.e. first, second and third cuts. Always create a new sequence (or even project) for a new cut. For example, when a new cut is about to be edited I firstly "lock" the old cut to ensure I don't accidentally alter it, then create a new duplicate sequence which I then proceed to edit. This means you can easily go back to older cuts if you are looking for something you have subsequently changed or deleted.

3. Shot order
It is sometimes difficult to know where to start on an edit. The most logical and classic method is to edit in the same way the film was shot -likely laying down the "master" shot first, and then cutting in the "medium" and "close-up" shots.
4. Pacing
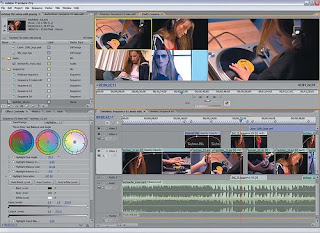
The pace of a film is critical. This will likely be dictated by the script or director but also editors must use their own instinct to decide where is a good place to cut and how fast and slow the feel should be. One method to help is to use music, or temp tracks. If you know the music that will be used you can put marks on the beats and then cut to that if appropriate. Or if the director has a certain type of music or score you can "temp" it in the edit to help ensure you get the right feel and pace.

5. Audio
Audio is often the secret to helping make cuts work. Although any extensive audio editing should be left for the actual audio mix, a picture editor can use overlapping audio and wildtracks to help make a cut work. Sometimes a certain cut does not work until ambient audio or sound effects are added to help sell the continuity.

6. Edit tools
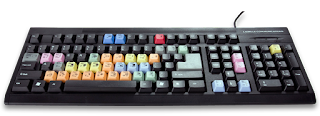
It is important for an editor to become familiar with the different tools his NLE offers such as slip or ripple cuts and other ways and means of cutting and moving clips on a timeline. It is also necessary to learn the keyboard shortcuts to those most commonly used to speed up the process.
7. Saving and Back-up
Make sure your NLE either automatically saves or save your project after any substantial changes. An editor must be aware of the need to constantly back-up. If not using a RAID system (which will automatically mirror the drive depending on the configuration) then at least regular duplication of the project and files used should be made on an hourly or at worst daily basis. There is nothing worse than losing a project due to harddrive failure -as it is almost impossible to completely recover or remember all the creative edit decisions that were made.

Tuesday, 8 February 2011

Tip #63: Establish an editing workflow

By Dan Parkes (Editor/Director)

Good organisation is key to any editing project, especially when you are dealing with a film that will be at least 90 minutes and over 20 hours of HD footage has been shot for it!

So we very early on devised a workflow that would ensure we could achieve this, even though we were editing on essentially a domestic computer using software that is not widely known for feature film work: Adobe Premiere Pro. I have personally used most Adobe products, starting from when I was a graphic designer at a newspaper using Adobe Photoshop and Acrobat. It seemed natural to later progress to Premiere Pro for editing and After Effects for compositing and effects. But many widely regard Premiere Pro as not being up for the task of a feature film, believing Avid or more recently Final Cut are better tools. I had used Premiere Pro for some large projects including a 45 minute feature film, but this was in HD and so was possibly going to be an issue.

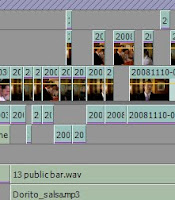
Above: Here is one of the 5 'reel' projects
(click to view at 100%)

The answer lay in two simple factors.

1. An intermediate codec
In Final Cut, when editing HD, the Quicktime files are often encoded using ProRes 422, developed by Apple. So I decided to use Cineform as an intermediate codec, converting all the m2t files from the camera harddrive into Cineform HD .avi files. Although much larger file sizes these worked very well in Premiere Pro and meant I could edit in HD without any issues. It also ensured no colour information loss when rendering out, maintaining the quality of the picture.

Above: Here is 'master' project
which combined all 5 'reels'.
(click to view at 100%)

2. Project structure
Although the Cineform intermediate codec made for easy editing I was under no impression that I could have one single project that would end up being 100 minutes long and still be stable. So I divided the film into 5 logical sections, which I called "reels" (inspired by the reels projectionists use) each being about 20 - 25 minutes in length. I worked on each reel independently (sound included) until I was satisfied with the cut. Then the 5 reels were combined into one single master project. This was the only difficult part, as I had to create a guide track and sync points for how these reels were joined for when the sound was mixed later but in the end did not prove to be too difficult.

Tuesday, 1 February 2011

Tip #62: The Importance of Paperwork

By Dan Parkes (Director)

Film making can be a creative and at times very exciting process. However, such is not possible without the all important paperwork that goes behind it. I know what you are thinking, this sounds all rather boring. But like a lot of things in life, sometimes it requires the old adage of 'work before play'.

There are two very important reasons for ensuring the paperwork is never overlooked:

1. Legal obligations
If you are really serious about film production then you will likely be setting up an individual company with separate accounts -either for the film as an entity or as a production company. Becoming a company has its own set of obligations, including the paying of tax and the use of equal opportunity and privacy policies and annual reports. The film itself will require contracts over pay, public insurance liability, ownership agreements, location permits and ever important health and safety and risk assessments forms. To try to avoid any of the above -no matter what budget you are on- is a recipe for disaster. But it is also good practice for the future. And most definitely comes in useful for Errors and Omissions insurance and other festival/distribution paperwork.

2. Organisation
Ensure your paperwork is well organised and always on hand. For example, have a main file that you keep all your documentation in. Have a system for keeping receipts for items purchased or expenses from cast and crew. Have a naming system for your script so you clearly identify what version it is on every page (if the script changes during production) or use a colour coded system (different colour paper for different versions).

Make sure you have plenty of generic release forms always on set. You never know when you will need to include an extra person in a shot! And make sure they sign it before they go on camera rather than having to chase people afterwards. We experienced this on location in the village of Alfriston. While filming an establishing shot to our delight a woman on a horse rode by, perfectly completing the scene. We asked if she could do it again, but not before ensuring she had signed a waiver that producer Sinead Ferguson had on hand for such a possibility. And with a location permit, make sure you have at least two copies on set, along with the associated risk assessment paperwork, so that if asked by a passing police officer or -in a worst case scenario- there is an accident you are well prepared to answer any questions.

Your Master Film File should include:
  1. Several copies of the script (they always get lost!)
  2. Cast and crew contact list (with names, telephone numbers etc)
  3. Call sheets (plus extra copies)
  4. Shooting schedule
  5. Shot list
  6. Storyboards
  7. Accounts/receipts/expenses
  8. Maps of the area
  9. Emergency contact name and numbers
  10. Cast and crew contract/agreements
  11. Background actors release/waivers (plus loads of extra copies)
  12. Location permits
  13. Health and safety policy
  14. Risk assessments
  15. Insurance details
  16. Note pad/paper/pens
Anything we missed? Please let us know in the comments below.
Need some example forms? Check out University of North Carolina School of the Arts site.