Thursday, 23 June 2011

Tip #74: Try 5.1 surround sound

By Dan Parkes (Director)

Recording and mastering 5.1 surround sound has until recently been the domain of big budget studios. However many relatively inexpensive audio software packages allow for multi-channel mixing and there was for many years a frustrating gulf between the ability to mix 5.1 and the inability to master a DVD with it. For Ambleton Delight we made the decision to experiment with 5.1 surround using a combination of software.

Firstly, lets define what 5.1 surround sound is. Technically it is actually six channels; the .1 refers to the low frequency bass channel. It normally comprises of six actual speakers: a front left and right, a center channel, two surround (rear) speakers plus a sub woofer (bass, or LFE). While there is the possibility of recording 5.1 on location for us it was all done in post, using Adobe Audition 3.
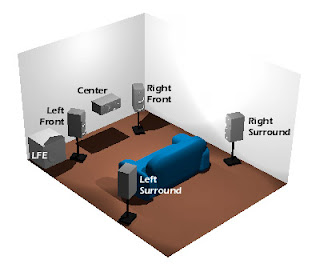
Our workflow:
  1. All of the audio in the film was divided into 5 main tracks: dialogue, foley, atmospheric sound effects, atmospheric music and score.
  2. In Adobe Audition 3 each of these tracks was then pointed to various speakers using its surround sound panner. For example the dialogue track (mono) was pointed to the centre speaker channel only. Foley effects were pointed to the front left and right. Atmospheric sound effects and music were spread around all of the speakers
  3. Surround sound "moments": There are one or two moments in the film when sound was actually pointed to the rear speakers -for example when someone shouts off screen. These should be used sparingly as they can draw extra attention to themselves.
  4. Score reverb. For the score of the film to be in 5.1 we created a "bus" so that a separate track was created containing just the reverb of the score which we then pointed to the rear speakers.
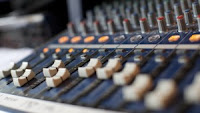
  5. Once the 5 main tracks of the film had been organised into which speaker they would be pointed, we then exported from Audition 3 six uncompressed mono 48K WAV files, each WAV file being for each speaker.
  6. We then imported these six WAV files into a freeware piece of software called "WAV to AC3 Encoder" which as its name suggests combined the six WAV files into one AC3 file.
  7. We then imported the AC3 file into Adobe Encore DVD authoring software as an "asset" and then added an extra audio track to the film's timeline (track 2 -it is best to have track 1 as the stereo track as this will be the default audio) and put the AC3 file onto the track -making sure it matched the length of the video.
  8. We created a menu option on the DVD to select the 5.1 track.
NOTE: Of course, this is very much improvised, poor man's 5.1! If you want it done properly it requires specialised skills as the art of surround sound is not easy to master. Also, it is best to use licensed Dolby encoders and software and have it validated by Dolby for official Dolby Digital branding that can then be put on your DVD and advertising!

Sunday, 19 June 2011

Tip #73: Record high quality voice over

By Dan Parkes (Director)

"In a world...."


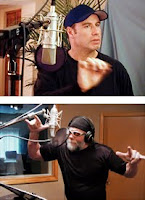
We are now all familiar with the seemingly ubiquitous deep film trailer voice that sounds like he has smoked a hundred cigarettes a day... (epitomised by the legendary late "Don" LaFontaine -picture left- who never smoked!). But that deep, crisp and velvet like voice over is now something possible for even low budget filmmakers to achieve.

In Ambleton Delight we had narration as voice over that starts and finishes the film and this was recorded in a living room.

Here are some tips on what we learned along the way:
  1. Is voice over really necessary? There are times when it is a too easy or safe option. Other times it is necessary for backstory.
  2. Reading written narration can -depending on the person- be quite an art form and require some practice to make it sound natural. Audition and rehearse as you would for any speaking part.
  3. If you can't record in an actual studio then try to replicate one. Reverb and echo is what will ruin your recording -eliminate it by recording in a small enclosed space, or by creating one using duvets, sleeping bags, blankets, cardboard, egg crates etc
  4. Treat the recording session the same as when directing actors on set -give as much or as little direction, back-story, motivation as required.
  5. Don't underestimate the power of a good microphone. That does not necessary mean an expensive one -you could possibly borrow or hire one for the day. Generally speaking capacitor microphones are better than dynamic for voice over.
  6. Make sure you have a pop guard -something that goes between the microphone and mouth to help reduce the puffs of wind from such things as the letter 'p'. You can use stockings to create one.
  7. Have large-print print-outs of the voice over, double spaced and a paragraph or less to a page. Don't have any notes that require page-turning as this will make a noticeable noise.
  8. Use a music stand to hold the voice over notes.
  9. Record high quality uncompressed digital files such as 48K WAV files.
  10. Make sure someone is monitoring with headphones and have this option also for the voice over artist so they can monitor themselves.
  11. Number takes and label accurately.
  12. Add compression and other effects as required afterwards (Pro Tools has a 'voice over' setting).

Tuesday, 14 June 2011

Tip #72: ADR - Avoid Dialogue Replacement

By Dan Parkes (Director)

ADR stands for "Automated Dialogue Replacement" and is the dubbing or re-recording of dialogue during post-production. Apparently in the UK it is called "post-synchronisation" or "post-sync".

This process is normally required due to technical issues such as poor on-location sound or interference. It can sometimes also be a creative choice -adding extra dialogue to make a scene make more sense. Or sometimes for creating different versions due to classification issues. Samuel L. Jackson famously had his key piece of dialogue from "Snakes on a Plane" rerecorded to replace the offensive language resulting in the dubbed version in he which says "monkey fighting snakes on this Monday to Friday plane"!

Sometimes up to a third or more of film can end up being rerecorded via ADR. However some directors such as Chris Nolan are well known for insisting on using on-location sound only, as quite often ADR -despite the best recordings- never rings true. So it certainly is best to avoid if at all possible.

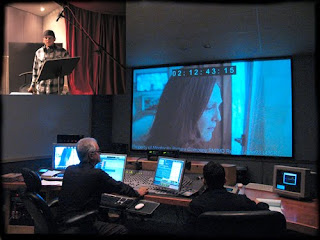
ADR sessions mostly take place in a recording studio with the original actor watching a looped playback of the shot and then trying to recreate the necessary dialogue. For Ambleton Delight we created a similar process, although it was recorded in a living room. Here are some tips we learned along the way....
  1. It really must be a last resort -despite the best efforts it will never match the real thing! Get it right on location as much as possible.
  2. Don't just record the word or sentence as it most likely will be too difficult to match the feel of the original dialogue. Record the entire scene or as much of it as possible, to ensure audio continuity.
  3. Treat ADR the same as when directing actors on set -give as much or as little direction, back-story, motivation as required.
  4. Have the actor move around to imitate the body positions on the screen -especially if it involves walking, running or jumping, as this affects the tone and breathing
  5. Use the same or as similar microphones as was used to record the original dialogue. Don't use a voice over microphone unless you need that effect.
  6. If recording in a non-studio location be aware of acoustics and reverb and try to match or simulate what the original environment was like.
  7. Provide a visual reference -a TV monitor or laptop. Beware that some TVs and laptops make high frequency noise that could affect the recording
  8. Loop the scene, with both video and audio continually repeating for at least three times, then the fourth is silent allowing the actor to fill in the audio.
  9. Have a visual or audio cue so the actor knows when the looping piece begins so they can time when to start.
  10. Do it in small sections. Don't expect an actor to be able to match precise mouth movements over several sentences. But balance this with the need for momentum and being "in-character".
  11. Not every word has to be exactly in-sync. Some timing can be assisted through audio editing -but of course better to get it as close as you can during the ADR session.

Saturday, 11 June 2011

Tip #71: The Final Sound Mix

By Dan Parkes (Director)

The impact of sound on a film should never be underestimated. Often clever and appropriate use of sound effects can really sell a shot, help with continuity and make visual effects come to life.

For Ambleton Delight, it was initially mixed using Logic on a MacBook. The final mix took place using Adobe Audition 3 on a PC (to create a 5.1 mix which we will detail in a later blog).

In addition to obviously a good recording of the original dialogue and sound (detailed here: ), the important components of an audio mix are:

1. A "Wild track"
A wild track is an audio recording made at the time of filming, normally when on location, of background sound and atmospheric noises when the cameras are not rolling. Whenever possible we recorded room tones and exterior sounds. These are incredibly valuable to help match shots in the edit or to cover holes in the audio. On one occasion we recorded the different sounds of the village councillors....grumbling, happy, complaining, applauding etc that we could then use when appropriate in the edit.


2. Foley
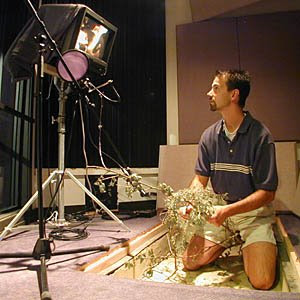
Foley is the art of recording live sound effects during post, like shoes on a pavement or a door closing, to match the film. In our case we recorded a number of foley effects during the post-production stage. For example I was used by Colin Bradley, the sound engineer, to cut vegetables and make all sorts of banging sounds in his kitchen for use in the film.

3. Sound effects library
If a sound is too difficult to record as foley, then there are a large number of libraries on-line with thousands of sound effects. Some are completely free while others may require payment. Here are a few you might want to check out:

www.soundsnap.com/
www.audionetwork.com/sound-effects/
http://www.pacdv.com/sounds/


4. Final Mix
You should now have dialogue, foley, room tones/wildtracks, other audio (radio/piano/CD player/TV) and score. Some effects may need further work -such as adding reverb or tweaking of treble and bass etc. Once ready you need to mix these altogether ensuring that the levels are correct and sound natural (some sounds work better if very subtle. The master volume must be set to a level that adheres to in-house or broadcast standards (for example -6db).

In the next few blogs we will specifically look at recording ADR, voice over, 5.1 and audio commentaries.

Monday, 6 June 2011

Tip #70: Colour grading

By Dan Parkes (Director)

Colour grading or timing is the art of enhancing, correcting or sometimes completely changing the colour and look of a film.

In our case a very simple colour pallete had already been decided upon by the production designer before we started filming. The plan was for the gritty flashback scenes to be completely in black and white, and the village scenes to be in heavily saturated colour. The camera system we used was thus set to capture a heavily saturated image which meant we were able to do a lot of the colour grading in camera. In fact very little of the village scenes were colour corrected.

Black and white flashblack scene colour grading

Here are some basics of colour grading

1. Software

Many NLEs come with colour correction filters which can do basic changes. However I recommend using Synthetic Aperture's Color Finesse, as it runs as a free plugin in Adobe After Effects and is an extremely powerful tool.

Color Finesse software

2. Primary

The first step of colour correction is to set the black, grey and white. In effect this is like doing a camera white balance - you are telling the software what is pure white and black and can be used to correct an incorrect white balance. This is also an opportunity to crush blacks (make them darker) and to check levels -making sure the colour and luminance are within safety levels. You may also need to adjust the brightness of the image.

3. Secondary

Once the the whites and blacks and are all consistent you can then change the feel of the image with either broad colour changes or subtle colour replacement. A common Hollywood colour grade is teal and orange (check an interesting article on this 'virus' here (http://theabyssgazes.blogspot.com/2010/03/teal-and-orange-hollywood-please-stop.html) but also the Matrix green or the 'Saving Private Ryan' bleach bypass.

The teal and orange 'virus'

In our film the most notable secondary colour correction were the day for night shots. Otherwise most other grading was for continuity.